Showing posts with label whatiwore. Show all posts

Short Hair, Long Dress // One Piece, Two Ways

Happy Saturday, friends! I'm attempting to make up for my recent radio-silence with a double whammy outfit post today ;) I recently got this dress for super cheap at H&M and I'm kind of in love with it. It's super comfy and easy to style...So today I'm showing you two ways I style it: one for day, and one for night!
For the casual day look I threw on a skinny belt, a jacket, and simple jewelry. I was stumped at first about what kinds of shoes to wear with a maxi dress other than sandals or heels, but after searching for some inspiration online and trying a few different things I realized you can definitely make booties work. Especially when their colors compliment your dress perfectly :)
For a fancier night look I put a shirt over the dress and tied it up to create a waistline. This is one of my favorite ways to wear maxis - day or night. In addition to changing up my accessories I also put on some darker lipstick, smudged a little black liner on my top lash, and braided back a piece of my hair. Easy peasy transition to a night look! 
Hope you have a wonderful weekend! Is anyone celebrating record store day today? I wanna get my hands on one of those Sam Cooke albums! Oh, and happy Easter! :)

Outfit Details: Dress//H&M, Jean Jacket//American Eagle, Circle Necklace//Tilde, Boots//Steve Madden, Belt//Aldo, Statement Necklace//J. Crew, Shirt//Urban Outfitters, Wedges//DSW

A Sunny Day On Mississippi Ave // What I Wore

This weekend was perfect in every way...all my friends were finally home from Winter vacation, the sun came out (a rare thing for us Portlanders), and it was a long weekend! Taylor and I tried to spend as much time as possible outside soaking in the Vitamin D. On Sunday we went to Mississippi Ave in Northeast Portland to walk around, eat some food, and find a new place to do a little work. On the way, we decided to take advantage of this pretty blue wall and snap a few outfit photos. This is my go-to outfit lately...comfy, but still cute! I was so excited when it was nice out so I could wear the hat Taylor got me for Christmas. He's a keeper, huh?
[Mississippi pizza pub]
[Beers at a German Pub full of football fans]
[Mississippi Ave]
[Checking out some new food carts]
[Outfit details] Shirt & Necklace: J. Crew Factory // Pants: Urban Outfitters // Belt: Target // Hat: Brixton // Lip Color: Smashbox Electric Pink

Lace Short DIY

A while back I was flipping through the Free People catalog, looking at all of the pretty things I can't afford.  I came across these shorts, which are way out of my price range.  I realized that I could probably do the same thing with an old pair of jeans and some lace trim.  I tried it out and was so happy with the results.

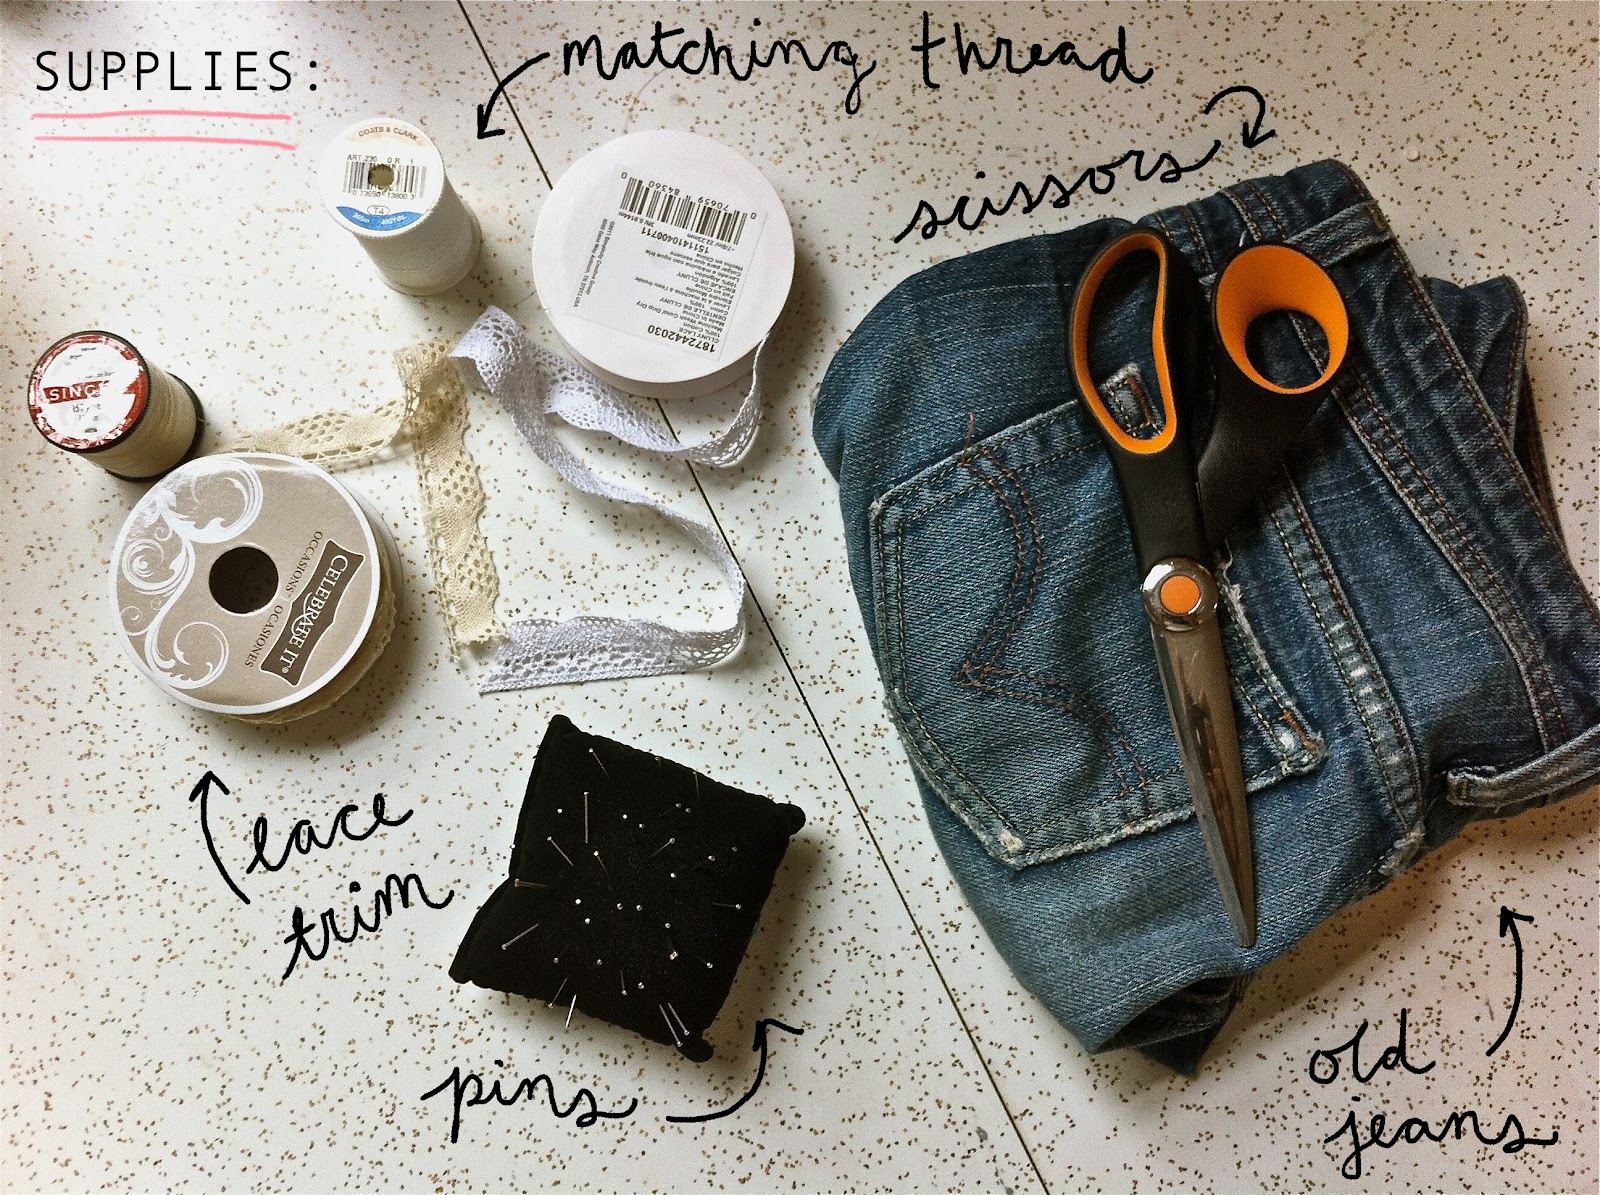
For this project you will need lace trim (or any other kind of trim), thread (make sure it matches your trim), pins, scissors, and an old pair of jeans that you've turned into cut offs.


Some advice for cutting your shorts: 1) start out longer than you think you want the shorts to be 2) use a marker/chalk to mark your jeans where you want to cut them while you have them on.  It is also helpful to use another pair of shorts as a template.


STEP 1: Pin the lace to the edge of your shorts.  The edges of my cut offs were already folded up so I decided to leave a fold, but I think it would also look good without a fold (that was my original plan).  You should experiment a little as you start pinning--does it look better folded/not folded? does it look better with the trim sewed on top/under the edge of the shorts?  This all depends on the trim you're using.  My trim was really thin and I wanted to be able to see the whole design, so I decided to sew it on the top side of the edge (the top of the trim also hid my seam nicely).  Pin the trim down every couple of inches (make sure it's nice and straight!).  When you get to the end leave a bit of extra trim on either end so that it can be folded under at the end (you can always cut off excess trim, but you can't add it back on).  I think it looks best if you make it so that the ends meet at the inner thigh seam of the shorts.


STEP 2: Begin sewing at one end (I used a machine, but I'm sure this would be really easy to hand stitch).  Go slowly to make sure your trim stays straight and doesn't bunch. When I got to the end I just folded the end of the trim under (and tucked the other end under it) before I sewed over it to hide the ends.


STEP 3:  My ends looked a bit awkward at the end, so I decided to hand stitch the two ends together.


This project was so easy and I love the end results...I'm pretty sure I'm going to be doing a few more cut off makeovers this summer!

flower headband DIY and ramblings


I've been home for less than a week and last semester already seems so far away! I'm settling back into being at home (other than the fact that I still haven't really unpacked, therefore my room looks like a hurricane went through it...oops).  Today was my first day of work--for now I'm just doing office work but it's nice to have something to do and to earn a little money before the camp I usually work at starts.  It's so nice to finally have time to start the long list of projects I've been dreaming up over the last semester, and I'm hoping I can maintain this momentum once work/my thesis research get into full swing.  I'm also excited to focus a bit on photography this summer--I've been trying to learn what I can through the internet and have been experimenting with my mom's fancy-shmancy cameras...SO, hopefully you will see some gradual improvement in the photography around here! Anyways, enough of that...

This is another super super easy/inexpensive project that is also perfect for summer.  Your summer wardrobe is incomplete without flower accessories to wear in your hair!

Here's what you need for this project:


I decided to make my headbands with smaller flowers, but I've seen people with headbands with larger flowers that look awesome (I just don't think I could pull it off)...so, if you're all about the dramatics you should use big crazy flowers! (I would love to see pictures if any of you try this!)

Also, if you want to put a little more time and effort into this project you could make your own flowers.  A while back I posted a tutorial for large silk flowers, so you could try using those.  I'm also going to try to throw together a tutorial for making smaller fabric flowers, so that should be coming later this summer.


Just cut individual flowers off of the stems.  Make sure that they're cut pretty close to the base so that they don't stick up too far off of the headband (but also make sure you're not making it so that the whole flower falls apart).  Put hot glue all around the base of the flower and quickly press it onto the headband, holding it in place until the glue is mostly dry.  I attached my flowers so that they were slightly tilted in one direction so that you could see them better from the front while I was wearing it (and so that you couldn't see the headband or glue).  Attach flowers until they cover the whole headband, minus an inch or two at either end.

That's it! I think that these headbands look great with beachy waves or a messy high bun. Here is the final product!: