Twinkle Light Christmas Tree

Raise your hand if there is a dead tomato/basil/blueberry plant freezing in your yard! Mine has a nice little plant cemetery going...The other day as I was admiring my collection of plant skeletons, I realized that the cages that used to hold up my plants were the perfect shape to use for a Christmas tree craft project! I have been brainstorming ways to create a tree/something that could stand in for a real Christmas tree for our house. There isn't a lot of room in this itsy bitsy house, and none of us will actually be home for Christmas, so it just didn't make sense to get a tree...but I still wanted something that felt festive and cozy. 
To make this little tree light I started by attaching lights to the cage vertically, securing them with washi tape as I went. This fills in the gaps so you can wrap the next string of lights around the cage horizontally. Mess around with the lights until you like they way they are distributed. Just make sure all plugs are in the back. Next, attach decorations! We don't have any tree decorations so I just made some gold and white stars and taped them to the cage. That's it! My house mate just came home with pine scented cleaning supplies and we may or may not be considering spraying the tree with them to trick our senses into thinking it's real...
I'm excited to curl up on the couch next to our little tree and watch Christmas movies this weekend :) It's not quite a real tree, but it'll do! (it case you're wondering, the tree is about 3 ft tall)

Embroidery Hoop Wall Art

Evening, friends! I finally made it home to PDX late last night after a long, eventful day of travel. Today has been quiet and relaxing. I stole my boyfriend's softest sweater, made a hot cup of tea and did work in bed all day! Oh, and I may have plugged in the twinkle lights and listened to a little Otis Redding Christmas Pandora channel...

Here is a little DIY I finished today that I have been meaning to do for a long time...filling this embroidery hoop has been one failed DIY after another. After using transfer paper to print a photo on fabric didn't work, I resorted to just washi taping a little feather in the middle of the hoop and calling it a day. Today that feather inspired me to try something else!

To do this I used a regular ink pad (since I won't be washing it or anything), a feather (needs to be one that isn't too fluffy - I cut mine down a little so there wasn't too much fluff and it was a shape I liked), letter stamps, white fabric, and of course the embroidery hoop.
I carefully stamped on the phrase I wanted. Then I used this tutorial to print the feather below the writing. I used a wine cork instead of a roller since I didn't have one, and it worked just fine!

I'm really happy with the way it turned out - I love that the stamp letters are a little bit imperfect. If you don't have letter stamps, you could also hand write a short phrase using a paint pen, or you could just do a feather! I'm excited to try a few more projects using my newly learned skill of feather printing :) 
Hope you're having a great Sunday! xx


A New Feature: Photo Friday//The Basics of Manual Mode

Happy Friday everyone! I hope those of you here in the US had a wonderful day full of relaxation and Thanksgiving left overs...and managed to avoid Black Friday lines/stampedes! (Speaking of which, Take a look at this cool info-graphic some friends made last year about Black Friday. Check out the sales happening at local/small businesses, or take a look in my DIY archives for presents you could make yourself instead!)

I have had a wonderful week at home (perks of working in a public school!) - I surprised my mom for her birthday, attended her big 50th birthday bash, had a yummy thanksgiving dinner with family and friends at Taylor's house, and finally finished and submitted my first grad school app (woo hoo!). Of course, all of this meant no time for blogging. Oh well! I'm back today with a new feature! This is going to be a bi-weekly feature to help me (and hopefully you as well!) improve my photography!

Here's the plan: Every other Friday I will choose an area of photography to learn about and focus on over the following two weeks. I will start with basics, like how the heck to use the manual setting/what all the numbers mean, and then move on to things like how to take good photos in different types of lighting, or how to take flattering portrait photos (some of the posts might be specific to a DSLR camera, but others could be used to improve your photography using any type of camera - even your phone). I know nothing about photography, so I won’t be writing my own tutorials. I will just be sharing my notes and links to the resources and information I find online or through books. I figure this will be a chance for us to learn together! I hope that these posts will be a forum for us to share information – if you know anything about photography or have some input on a particular technique, I would love to hear your suggestions in the comments. 

In each post I will share a few photos I took using the new techniques I’m learning...So the posts will also be a way for me to share some personal photos. If others are interested in joining along and linking up each week with the photos you took using your new skills, that would also be great! - Just leave a link to your post/photos in the comments.

Also, if any of you talented photographers (or non-photographer bloggers who still take amazing photos) out there would like to contribute to this feature, let me know! It would be really cool to have occasional posts with original content from photographers themselves who actually know what they’re talking about.
Ok, so, here is the first topic for this feature: how the heck to use manual mode.

This is something I have learned half heartedly in the past, but the info never really sunk in. Every photography blog I have read says that learning to use manual is the first step to getting great photos with your SLR...so I figured it's a great place to start! (Sorry to readers without SLRs, future posts in this feature will apply to you, I promise!)

Gold Chain Headband DIY

This DIY is inspired by a chain headband I saw a while back in Urban Outfitters. It is super easy and cheap to make, and you can customize it any way you like...You could make it thinner, thicker, braid it, add in silver/brass/copper chain or bright string or different styles of chains...so many options! I think that this simple gold one will be great to wear around the holidays. Also, I discovered that this headband makes a cute necklace! I would just wear it with my hair down to hide the elastic in the back a bit.
All you will need is a few inches of thin elastic, a needle and thread, two large jump rings and a bunch of chain (I think I used a couple little packages of chains. You might be able to find some cheaper chains in bulk online). Measure your head to decide how long you need to make the chains. Leave a couple of inches in the back for the elastic. Cut the elastic to be a little shorter than the space you left (that way it will be tight enough). Cut your chains to your desired length, trying to keep them all the same length as much as possible. Remember, if you plan on braiding your chains, you need to take into account the shortening that will occur. Attach the chains to a jump ring on either end. Now, take your elastic, loop it through each of the rings and sew it in place. That's it!
Due to a lack of sunlight, or a tri pod, or a functioning camera remote, or someone to help me take pictures I struggled majorly to get a good picture of this...the one that shows best how this headband looks on ended up being a mirror picture I took in my room...oh well!

Confessions of a Blogger

Emorie of Oh Whimsical Me tagged me the other day to do the "Confessions of a Blogger" post and answer a few questions about blogging. Thought I may as well give it a go in case you are interested in hearing a little more about me and my blog :) If not, just skip on down to the next post!

1. When did you first start blogging and why?

I first started blogging in June of 2011 on my first blog “The World Through Kaleidoscope Eyes.” In September I changed my blog name to Paper Umbrella and moved everything over here! From the time I discovered DIY/Lifestyle/Fashion blogs the idea of starting my own was always in the back of my mind, but I never got the courage or had the time to take the plunge. I finally decided to start one because I was about to leave to study abroad in the Dominican Republic and wanted somewhere to document my experience. I didn’t end up being able to blog all that much while I was there, but when I got back to the US I decided to start posting DIYs. I love being creative and wanted a place to share my projects and inspiration!

2. Have you had any past online presence?

Just on my old blog. Before that I just spent a lot of time on Pinterest and other blogs. 

3. When did you become serious about your blog?

I became really serious about my blog when I changed the name and design in September. Before that I really didn’t have a lot of time to devote to it so once I found myself unemployed and with some extra free time I decided to start over and make it a priority.

4. What was your first blog post?

My very first post was a little intro with some pictures of some flower hair clips I made. The first real post was a DIY for silk flowers.

5. What have been your biggest challenges blogging?

Really, the biggest struggle has been finding the time and staying organized. It’s hard to juggle a blog and a full time job and grad school applications and all of my other commitments (I'm an over-committer). Luckily I love blogging, so I see it as something fun to do in my free time. I also have a hard time with networking with other bloggers – I have come across so many interesting people who I would love to connect with more, but sometimes my introversion gets in the way!

6. What is the most rewarding thing about blogging?

There are so many inspiring and kind people in the blogging world – I love it! It is also great to have something to encourage me to keep creating and a place to share what I love with others. It’s amazing to meet and hear from people who are passionate about the same things. My blog is slowly becoming a place where I share more of my life, and I love having somewhere to keep memories and reflect on everything.

7. What is the most discouraging thing about blogging?

One thing that is a little scary about blogging is that you are opening yourself up to criticism – I haven’t experienced it, but I know how easy it is for people to hide behind their computers and say hurtful things to others…Knowing this makes me think extra hard about certain things I post. I also definitely identify with Emorie’s response to this question; there are so many other areas that I am passionate about beyond what I tend to post here, and sometimes I don’t include these parts of my life because I worry about how readers will respond or that they won’t find it interesting. In some ways I feel ok about that because I am able to express those passions in other areas of my life…but it’s something I think about a lot.

8. What is your lasting inspiration or motivation?

There is inspiration everywhere! I just truly love being creative and sharing with others. The way I feel when I create something awesome or take a great picture or create the perfect mix is the best motivation.  I am also so motivated by the fact that there are people out there who get just as excited about these things as I do and want to learn from me.

9. What is your blogging dirty little secret?

I’m not too sure what kind of answer I’m supposed to give to this question…hah! I am a major procrastinator and my ideas for this blog are all over the place. I often end up blogging way past my bedtime or when I should really be doing other things. Do those count as dirty little secrets?

10. What is your current goal as a blogger?

I just want to keep seeing my blog grow and keep pushing myself to step out of my comfort zone as a creative person. I want this blog to be a place that not only inspires others, but also myself – I don’t want to look back at posts and see the same old things. I want to grow and experiment – maybe even fail a few times.  I think that’s ok. I also want to do more networking and pursue opportunities to try new things and work with others.

11. Have you learned or become passionate about anything through blogging that caught you by surprise?

I have become a lot more interested in photography. I have so much improving to do in terms of my photography skills, and Paper Umbrella has made me more motivated to learn more about photography…I recently decided to really buckle down and work on this by creating a new weekly feature (more on that later!).


I'm tagging:

Danica of Goodheart
Jordyn of Pretty Lovely
Andra and Deanna of Birds & Oxfords
Suzanne of A Coin For The Well
Caroline of A Batonette A Day

Make Your Own Rings!

Who else is obsessed with the recent trend of tiny stacked rings? The other day I found the "show me your stack" feature on the blog Unruly Things and spent a good hour admiring the beautiful stacks of rings. I decided it's time I invest in some stackable rings, and then promptly came to the conclusion that I can't afford stacks of rings and instead put a few on my christmas wishlist. After a bit of searching around and lusting after rings, I realized I could probably create a few little rings with some sturdy thin wire and a pair of needle nose pliers. This project ended up working out so well! I'm really excited to make a few others and start building up my stacks of rings!

To make one of these rings you will need some thin (but sturdy) wire. I think the wire I got was 22 gauge and it holds it's shape well. You will also need a pair of needle nose pliers and wire cutters. For the xo ring you will need a soldering iron (I don't know why, but apparently we have one at our house...also I originally called it a welder but then learned that wasn't what I meant...oops!) or some strong, clear glue to hold the x in place.
I drew the diagram above to help you shape your xo ring if you'd like to give this design a try. Start by shaping your ring around a pen or chapstick/lipstick tube that is close to the size of your finger. You can adjust it to your exact size once you've rounded it around the tube. Next use the piers to shape your "o" first, then your "x." Then clip off the extra wire. Use your soldering iron to connect the 2 parts of your "x" or use a small dab of clear glue (because, honestly, I don't know why you would own a welder...). You could also just leave the "x" as it is if you're ok with having to adjust it back into place every so often.

Other ideas for wire rings: a heart, a little bow, a knot, something like this, or you could attach a bead or piece of jewelry hardware. If you decide to make one of these rings, put a link to pictures in the comments! I will put up some pictures once I get around to making more :) 

Heavenly Pretzels & Spicy Cheese Sauce

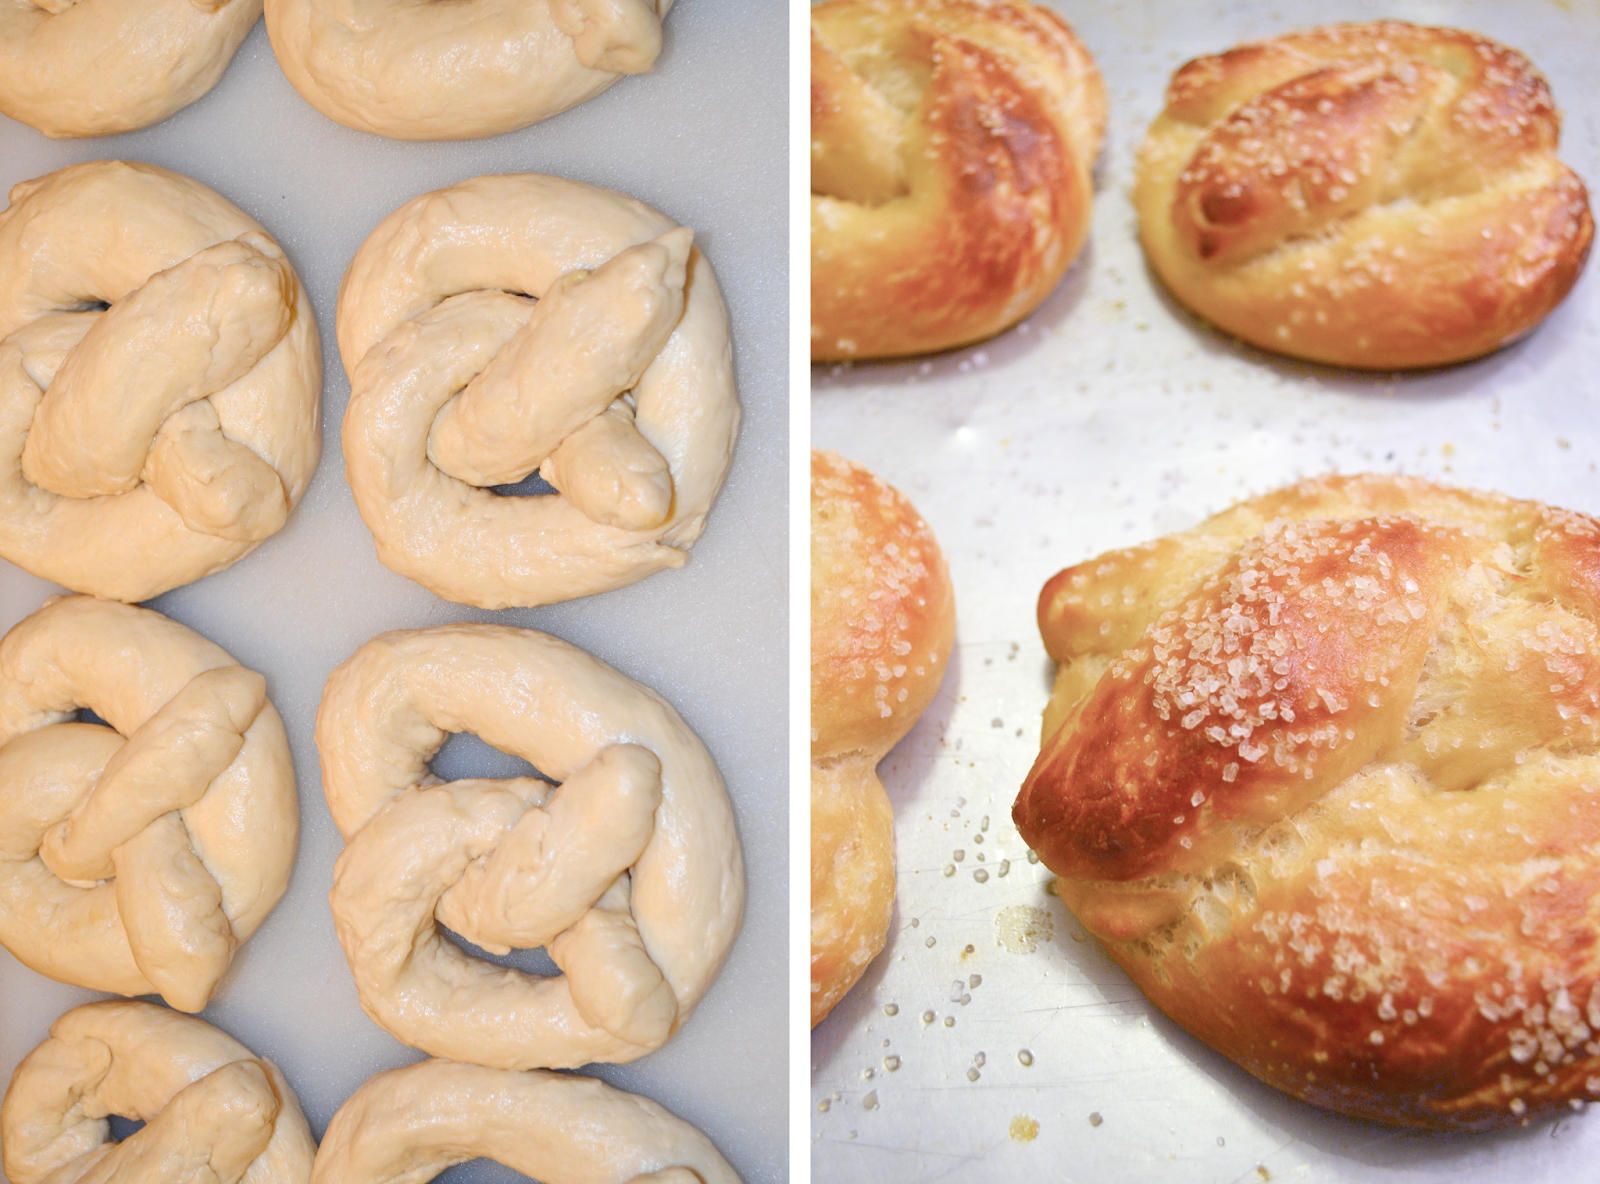
I have something to tell you, but you guys have to promise not to judge me or tell anyone else. My number one guilty pleasure food is soft pretzels and spicy nacho cheese. Especially that nasty fake cheese. Mmmm. So, when I saw this recipe I pinned it immediately. This weekend Taylor and I decided we wanted to bake something, and I managed to convince him that we should make pretzels and cheese sauce (he thinks I’m gross). These turned out SO yummy. Go make them. Right now. You won’t regret it.
For the pretzels we just followed this recipe from Half Baked Harvest. The recipe is perfection, so no need to make any alterations. These pretzels are perfect for making on a lazy Sunday at home. We spent about half the day making the pretzels, working on projects in between the steps.
We changed around the cheese sauce a little based on what we had on hand. Here’s what we did: Make a roux like they say in the recipe above, then add the milk (my roux didn’t really do the job and the milk wasn’t thickening, so I added a little corn starch). Next add in 3 oz cream cheese and around a cup of sharp cheddar cheese. Once the cheese is melted add some chopped up pickled jalapeƱos. I think we used around 15-20 of the little slices. Next, add in a few tablespoons of the juice from the jalapeƱos. I’m pretty sure that this was the ingredient that made the sauce. Lastly, add in some cayenne pepper a little sprinkle at a time, testing until it’s spicy enough for your taste. Now, dunk your warm pretzels in there and devour them all in one sitting. I won't tell if you don't.